
We all know that Google Analytics has become essentially the standard in campaign metrics and analysis. While it does have it shortfalls (quite a few of them actually), and that it does not actually measure every click coming through the website (it uses ‘sampling’ techniques), it does have several powerful features which make it quite valuable from a measurement standpoint.
Every campaign which is run should always have “UTM” tags appended to the destination URL’s. At ProData, we ensure that all campaigns have the tags, or if not, we will add them on our clientele behalf.
There are three critical UTM tags which should always be used:
- utm_campaign – the campaign name or reference name
- utm_source – who/where the campaign ran from
- utm_medium – the type of media that drove the traffic (PPC, Facebook, Google Ads, etc)
So a traditional URL for a destination page may look like: https://abc.com/123.html — and appending the UTM tags would modify the URL to: https://abc.com/123.html?utm_campaign=xxx&utm_source=ProData&utm_medium=xxx.
Now that we know how to construct the campaign, we need to understand where to find the information collected within Google Analytics.
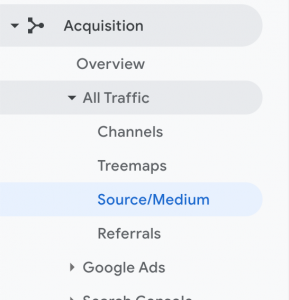
The to find all of your traffic, broken down by Source & Medium, the navigation hierarchy will be:
Acquisition > All Traffic > Source / Medium
To find all of your traffic, broken down by Channels (e.g. Paid, Organic, etc) you would select:
Acquisition > All Traffic > Channels
Next, we want to be able to isolate traffic by the unique campaign.
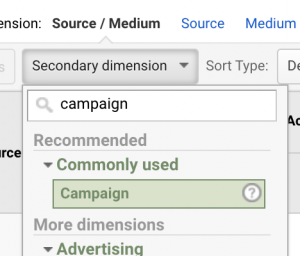
To do this, you will select “Secondary dimension” under the “Source / Medium” dimension menu and begin typing “Campaign” — it will auto-populate.
Select “Campaign” from the list and the report will magically update to reflect your Source / Medium and Campaign information.
From there you can learn more about bounce rates, time on site, pages viewed per session and more.